It’s entirely possible that others know of this method, but I haven’t been able to find a record of someone bleaching and toning cyanotypes using silver nitrate. And while I still have a lot of experimentation to do, my preliminary results are so promising that I’m sharing them now. However, keep in mind that anything I say in this post may change once I (and hopefully others) experiment with this process some more.
Why bleach and tone with silver nitrate?
Because it allows you to bleach and tone in one step, with one chemical, and without needing to wash the print after applying the silver nitrate solution.
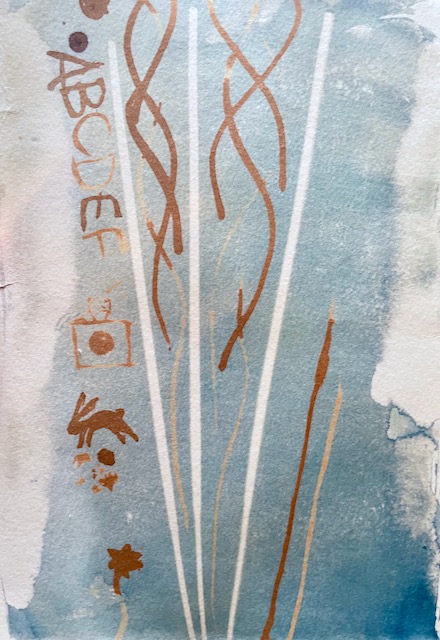
And, very excitingly, you can apply the solution with a brush, meaning you can selectively bleach and tone specific areas of your print rather than the entire print.
What color does toning with silver nitrate produce?
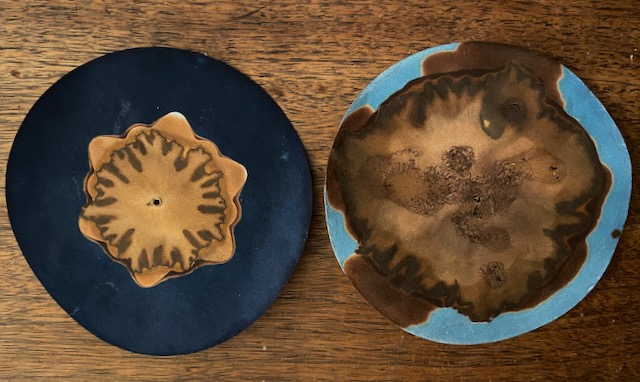
Brown, though I suspect that you can mix it with other toners to shift the warmth and hue of the brown. For future experiments, I’m hoping to mix a solution of silver nitrate using tea and other liquids instead of water.
Happy accidents
For over a year now, I’ve been making chromatograms, which are made using a 5% aqueous solution of silver nitrate. See my previous posts on that process and its significance to me here and here.
On my skills-to-learn list has been cyanotypes. My first few were failures because between the anemic Chicago winter sun and a UV light meant for reptiles, I wasn’t exposing them fully. Going off of the written instructions (without pictures) that came with my cyanotype kit just wasn’t cutting it. But I finally got a stronger UV light and signed up for a photo class, so now my cyanotypes are coming out a beautiful, vibrant blue.
As soon as I figured out how to make cyanotypes the proper way, I wanted to combine them with my chromatograms for a new body of work I’m making.
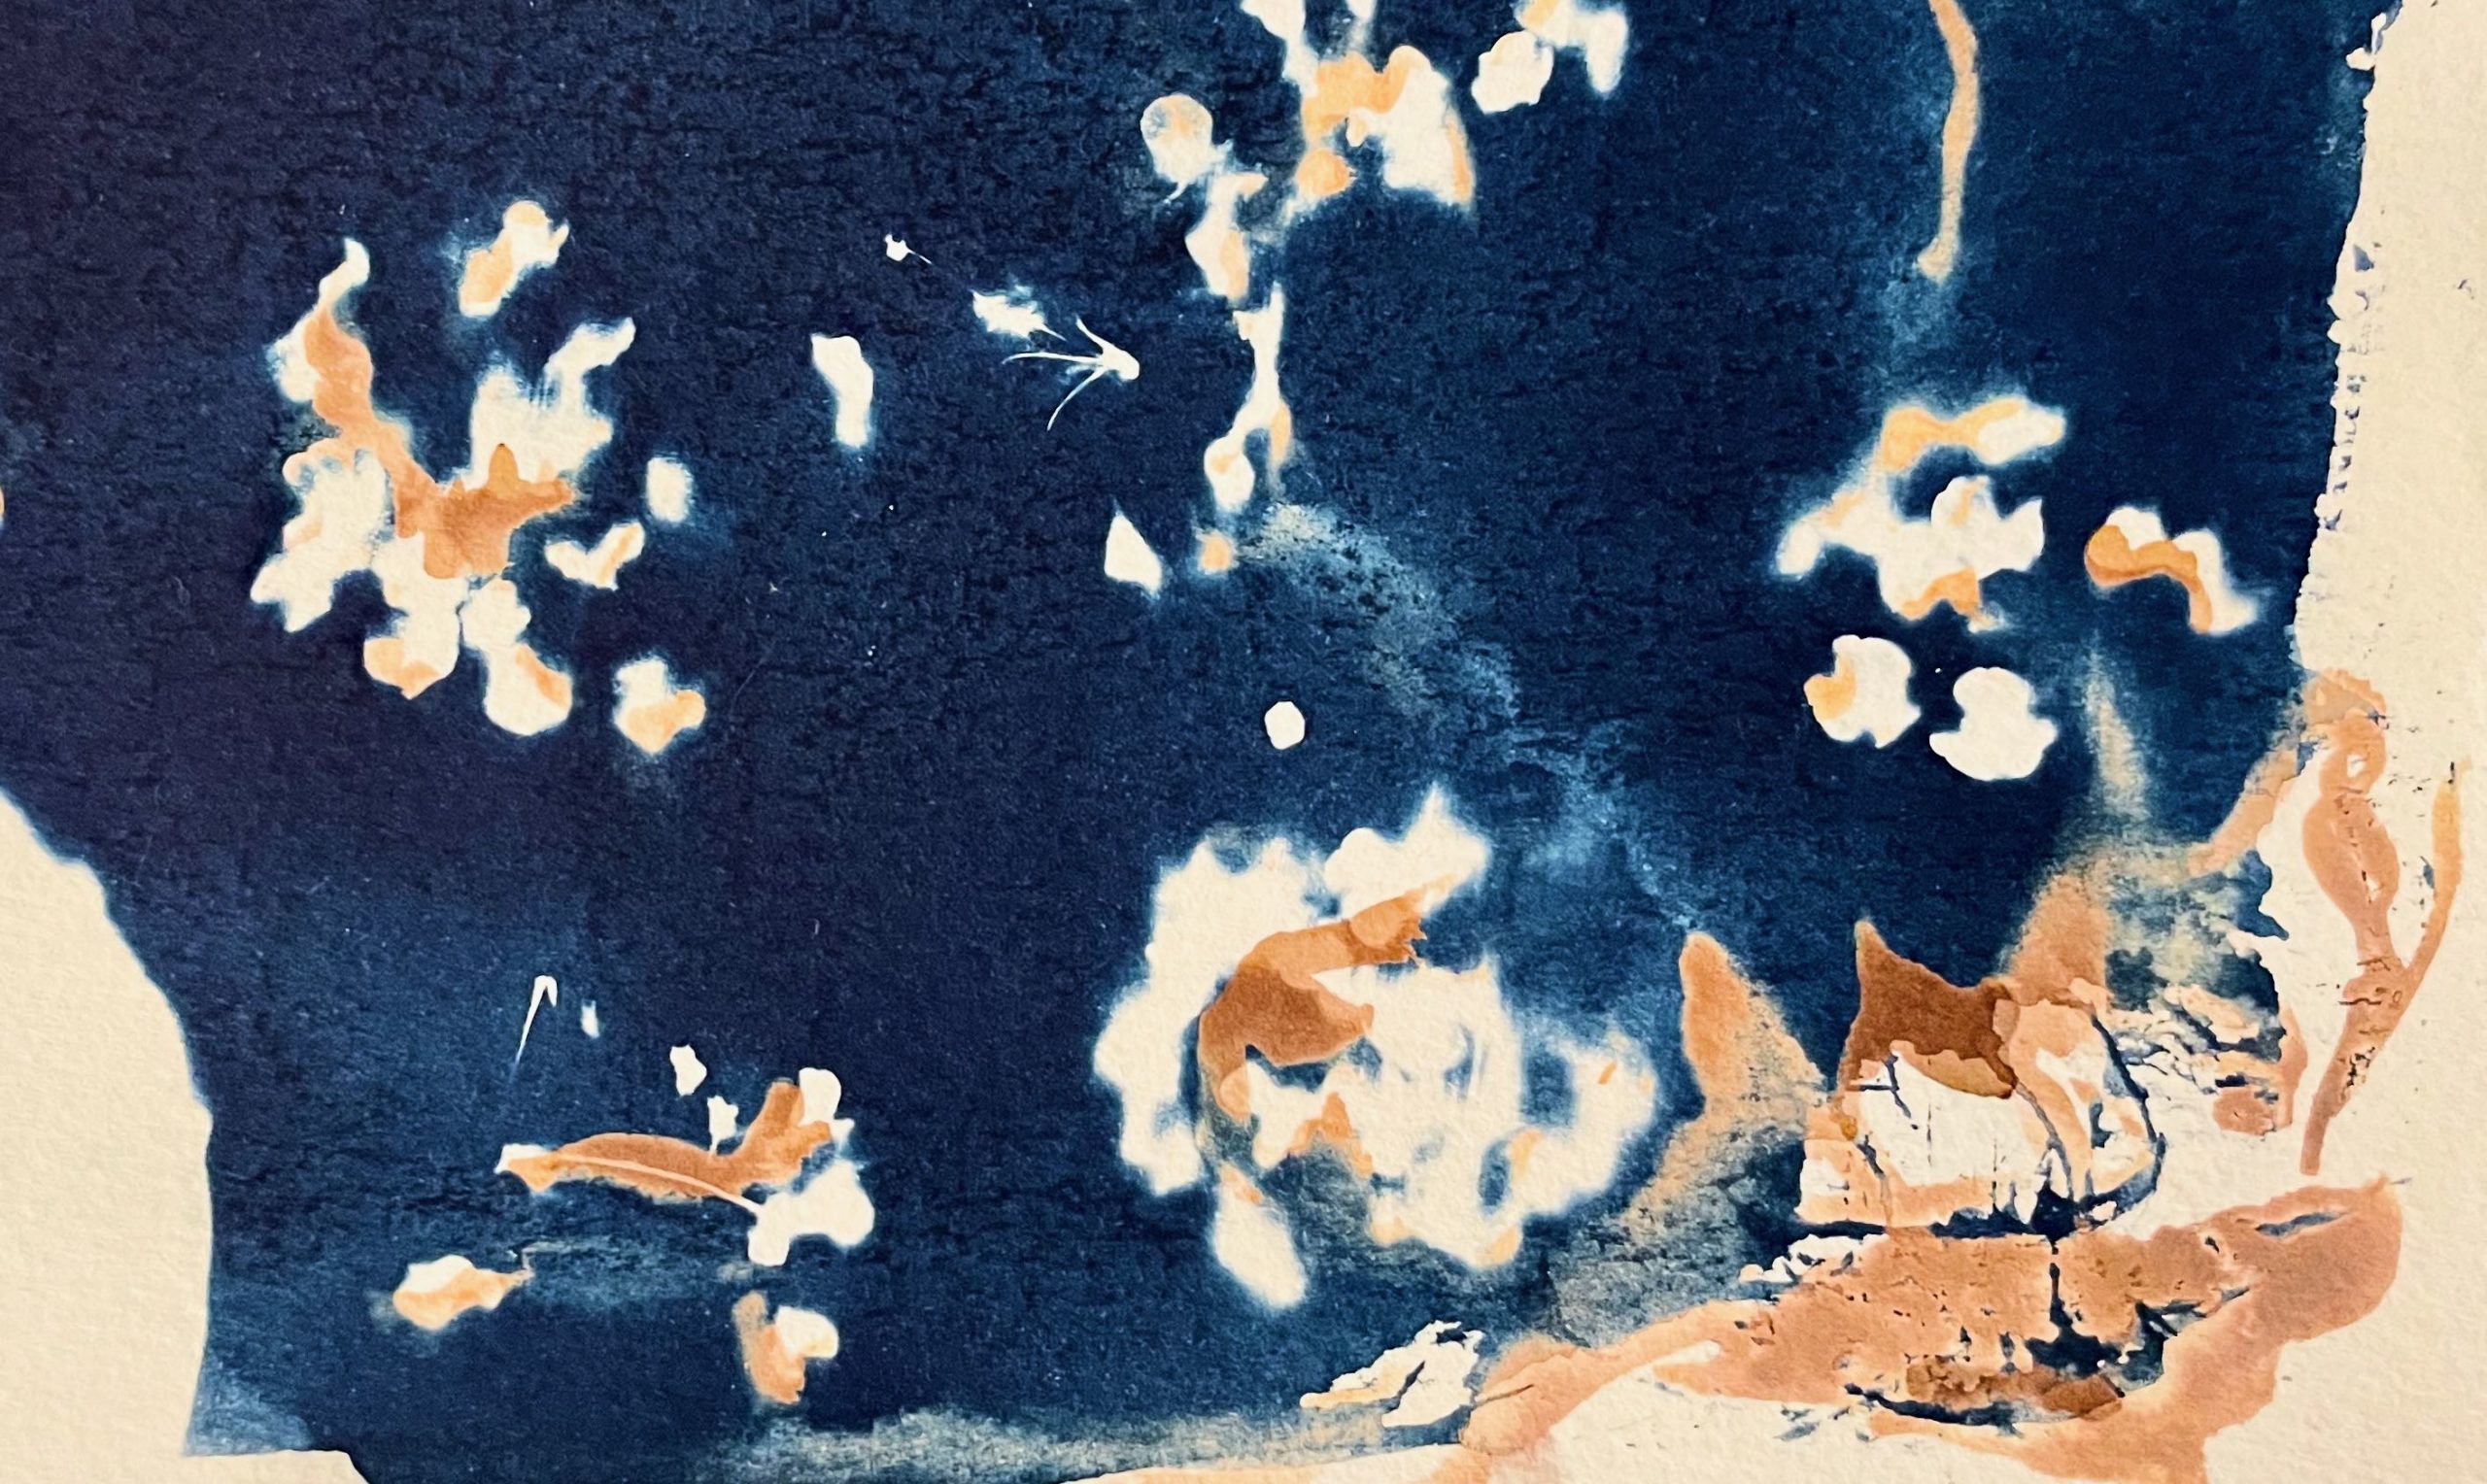
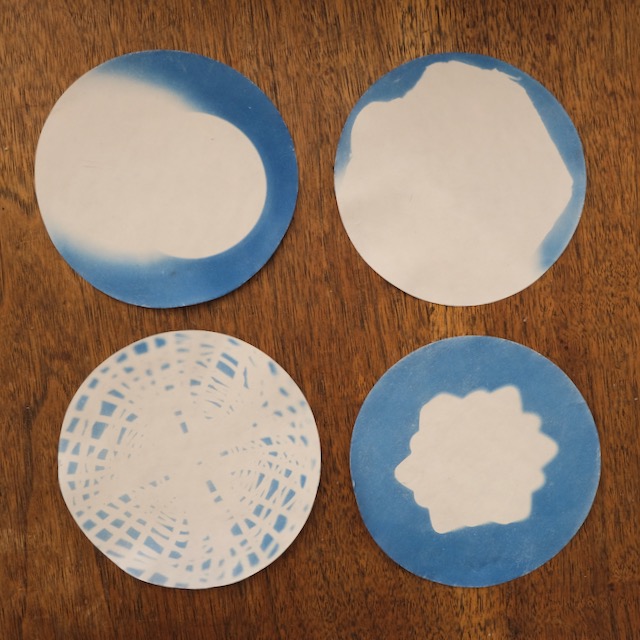
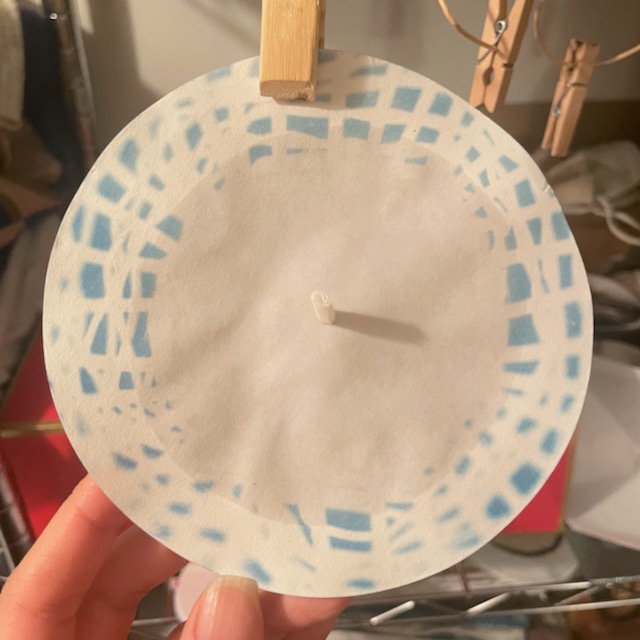
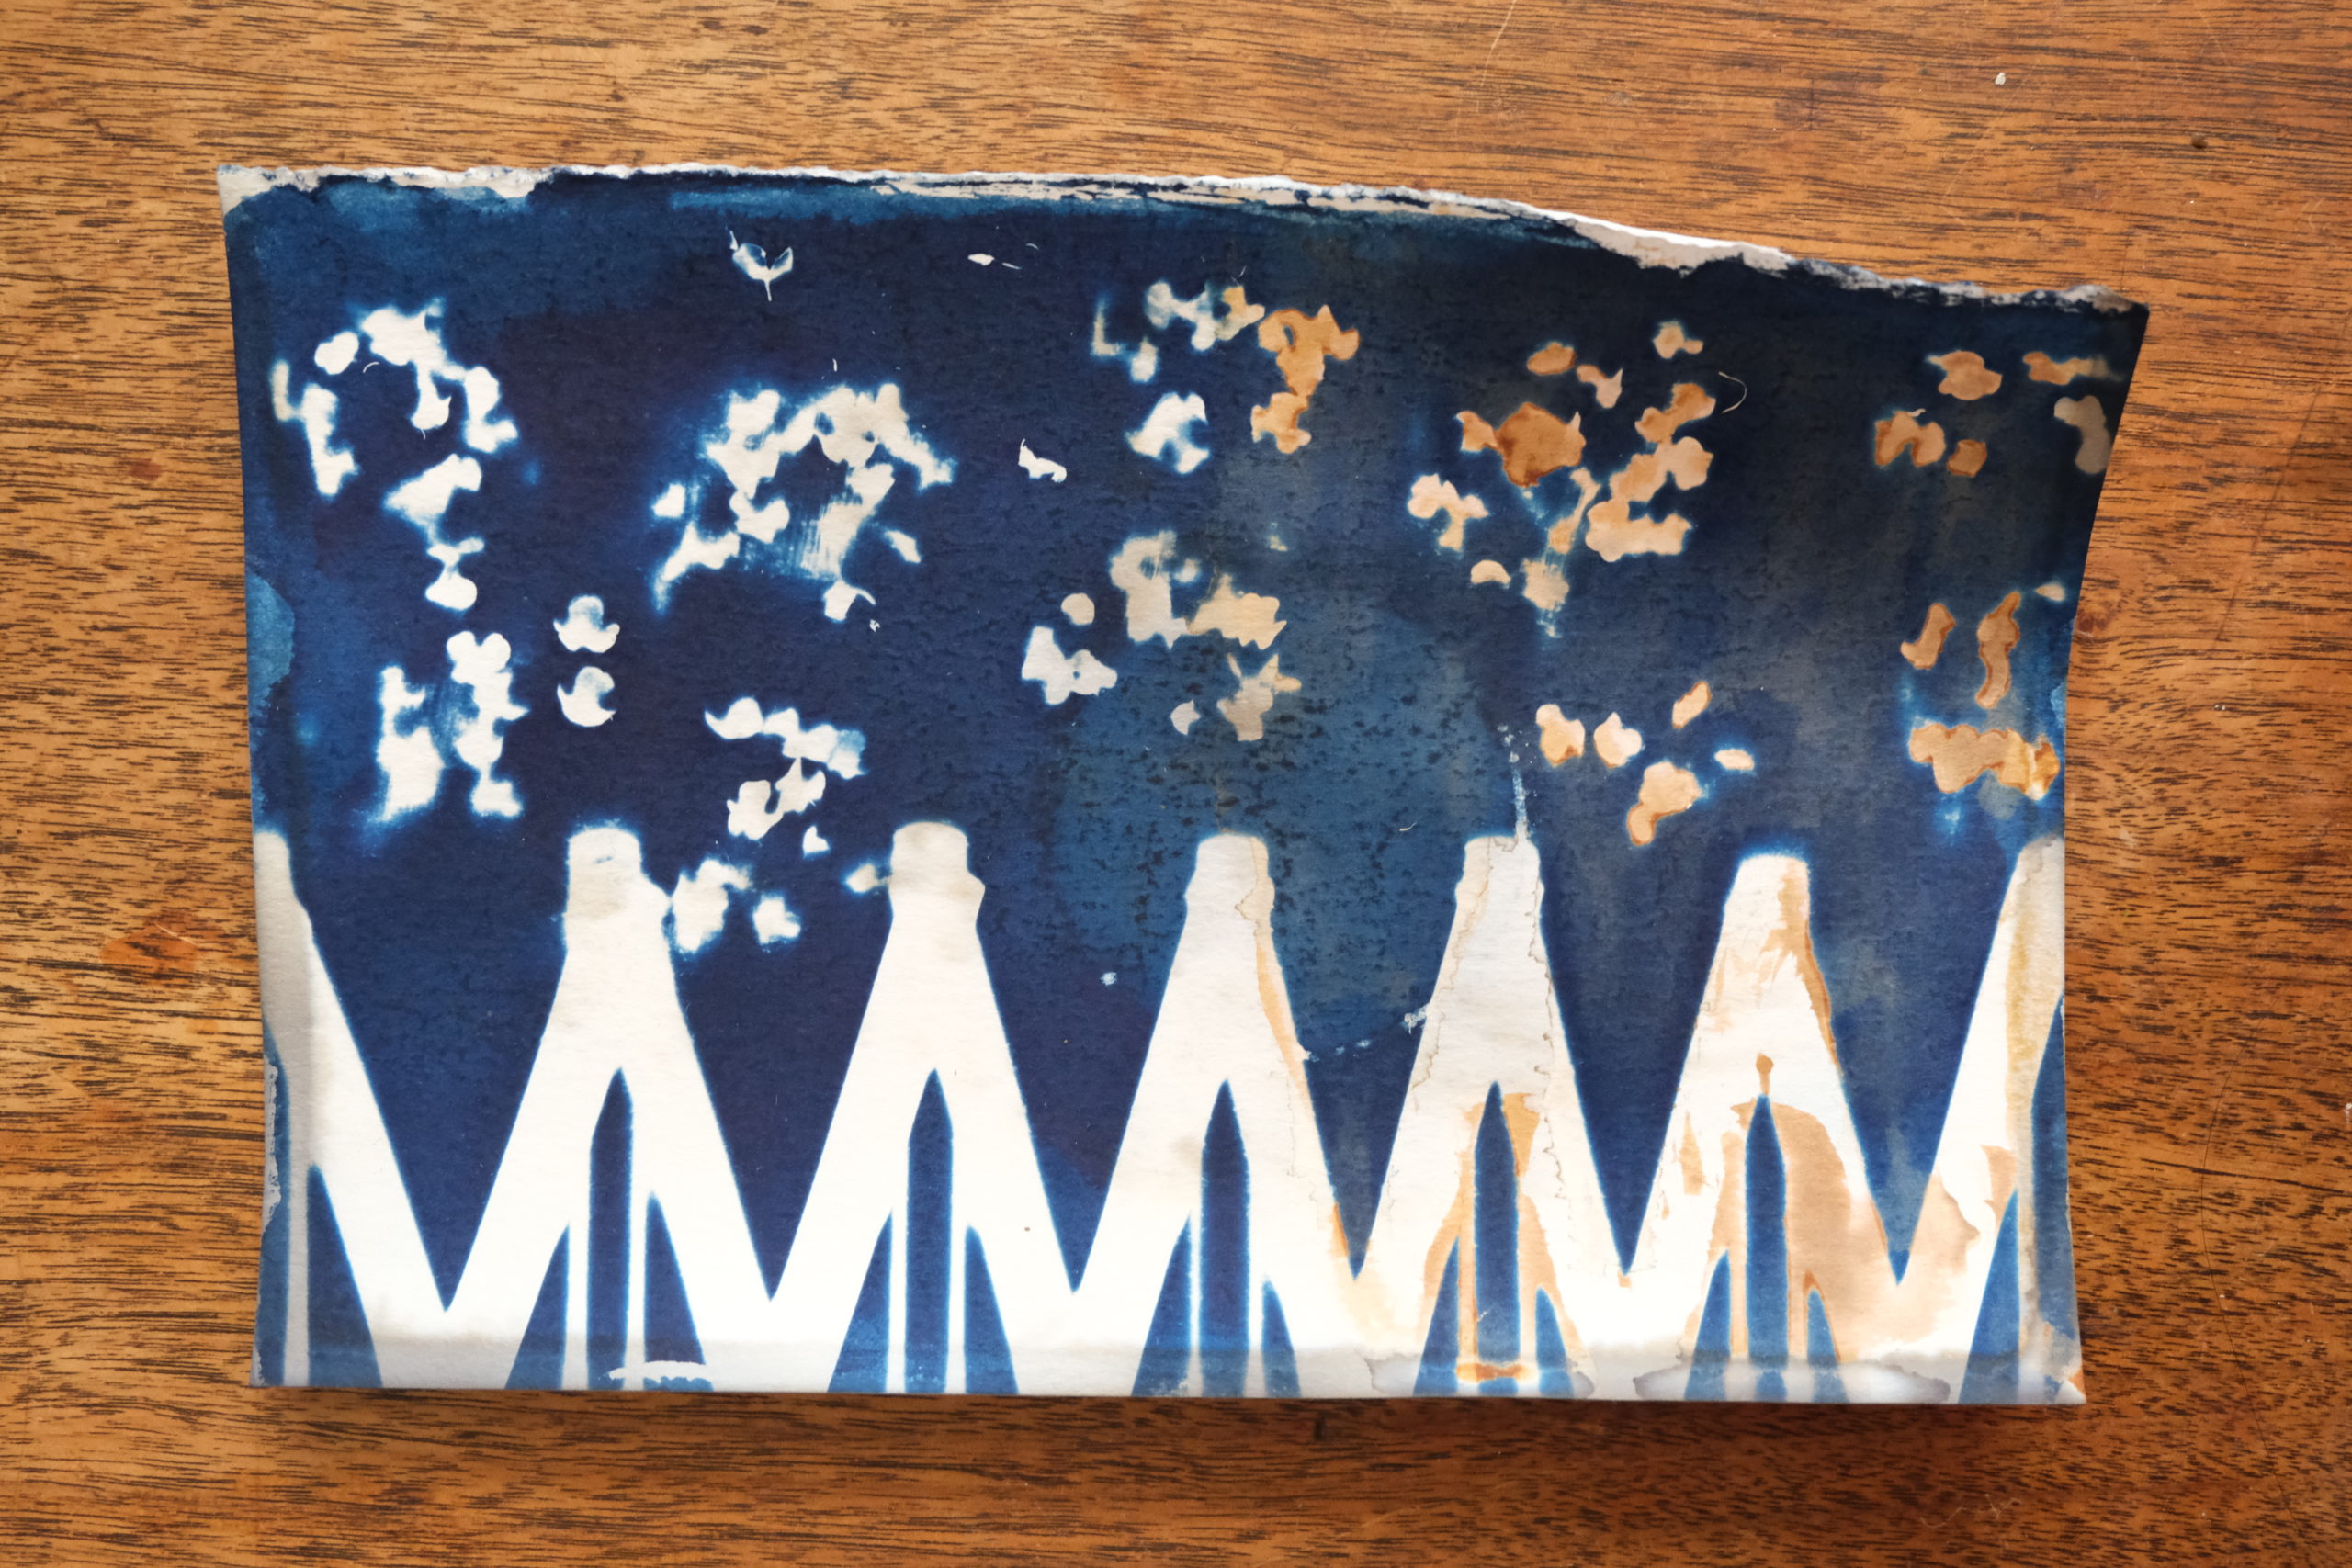
I started my experiments with some of my early, underexposed cyanotypes. I’m really grateful that my first cyanotypes were “failures” because I may not have recognized the potential in combining cyanotypes with chromatography without them. That’s because underexposed cyanotypes seem to work better for bleaching and toning with silver nitrate.
What materials do you need?
- Cyanotypes, preferably underexposed &/or made with a thin or diluted layer of cyanotype solution
- 5% silver nitrate aqueous solution (the standard solution used in chromatography), can be slightly exposed to UV or mildly adulterated
- Paint brush or other way of applying the silver nitrate to the cyanotypes
- Sunlight/UV light to expose the dried silver nitrate solution
What kinds of cyanotypes can be bleached and toned with silver nitrate?
I have only tried bleaching and toning cyanotypes made on paper. I suspect that there may be difficulties with using this method on less porous surfaces. If you try it on other surfaces, let me know!
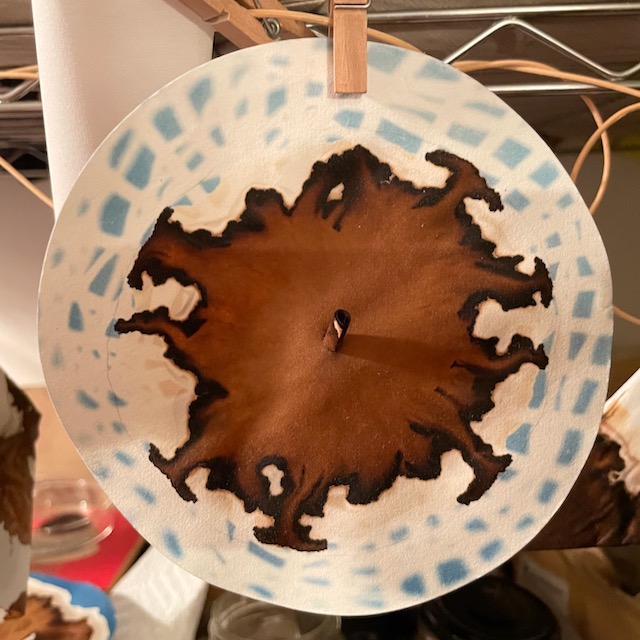
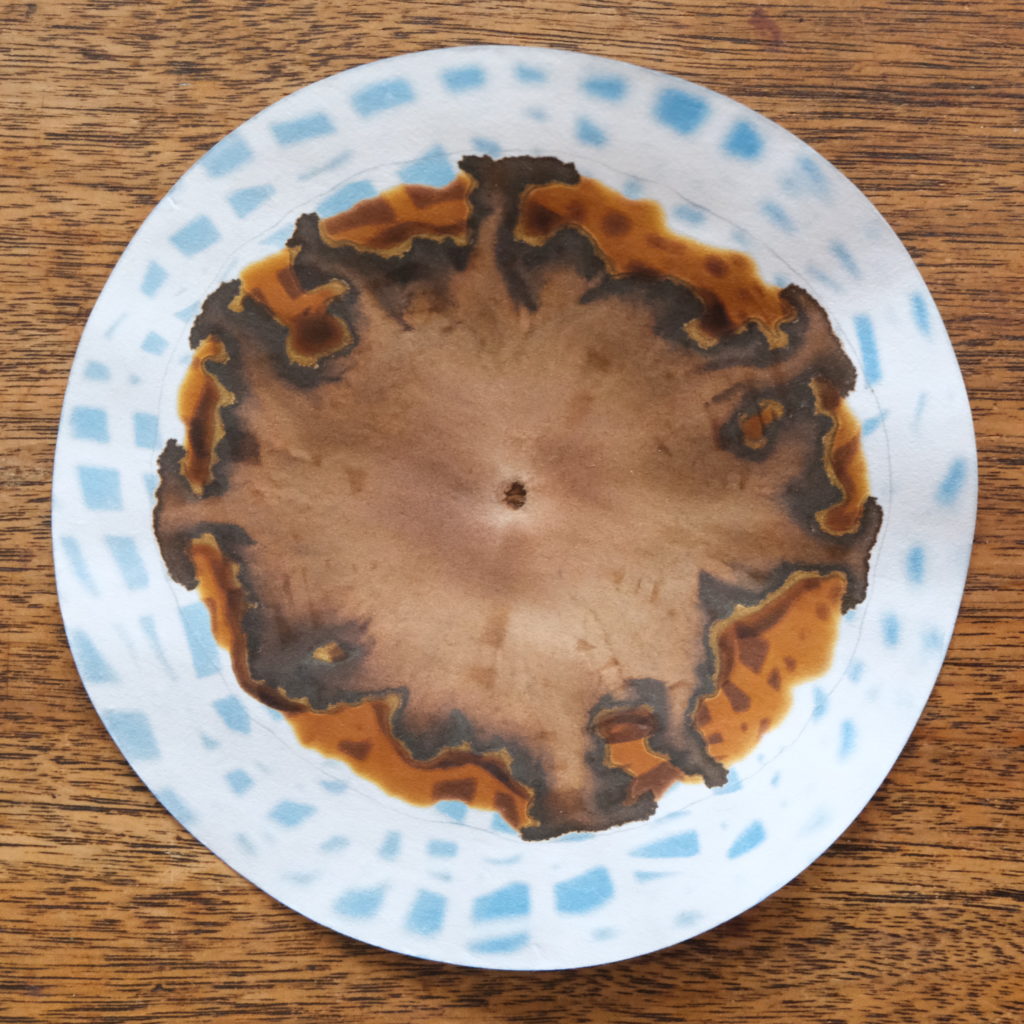
Bleaching and toning on paper so far seems to work best on underexposed cyanotypes. On these prints, smaller amounts of silver nitrate are needed to fully bleach the print.
This method can work with fully exposed cyanotypes, but the results can be too subtle on the darker blue areas to be worth it. However, using a thin coating of cyanotype solution on your paper and then fully exposing that can work. It’s actually a great way to create a two-toned print that has both vibrant blues and warm browns. Just keep in mind that the stronger your blues, the more likely you’ll need to use more silver nitrate solution. And the less bleaching may occur, which can lead to muddy toning. This isn’t necessarily a bad thing, just a thing to know so you can get a specific look- if you want more blue in your final print, then fully exposing your thinly coated cyanotype may be helpful.
How to bleach and tone using silver nitrate
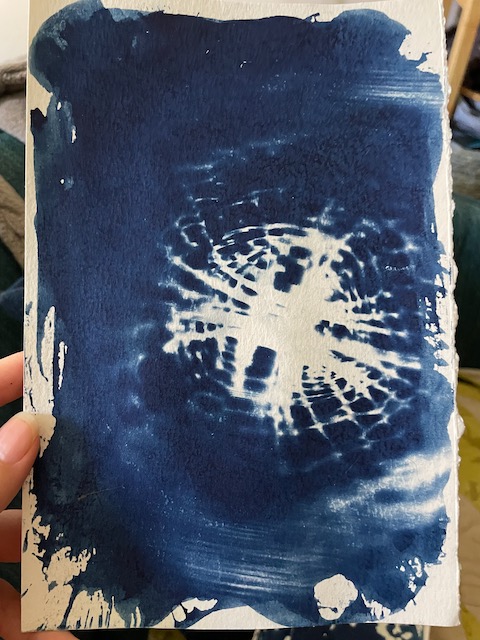
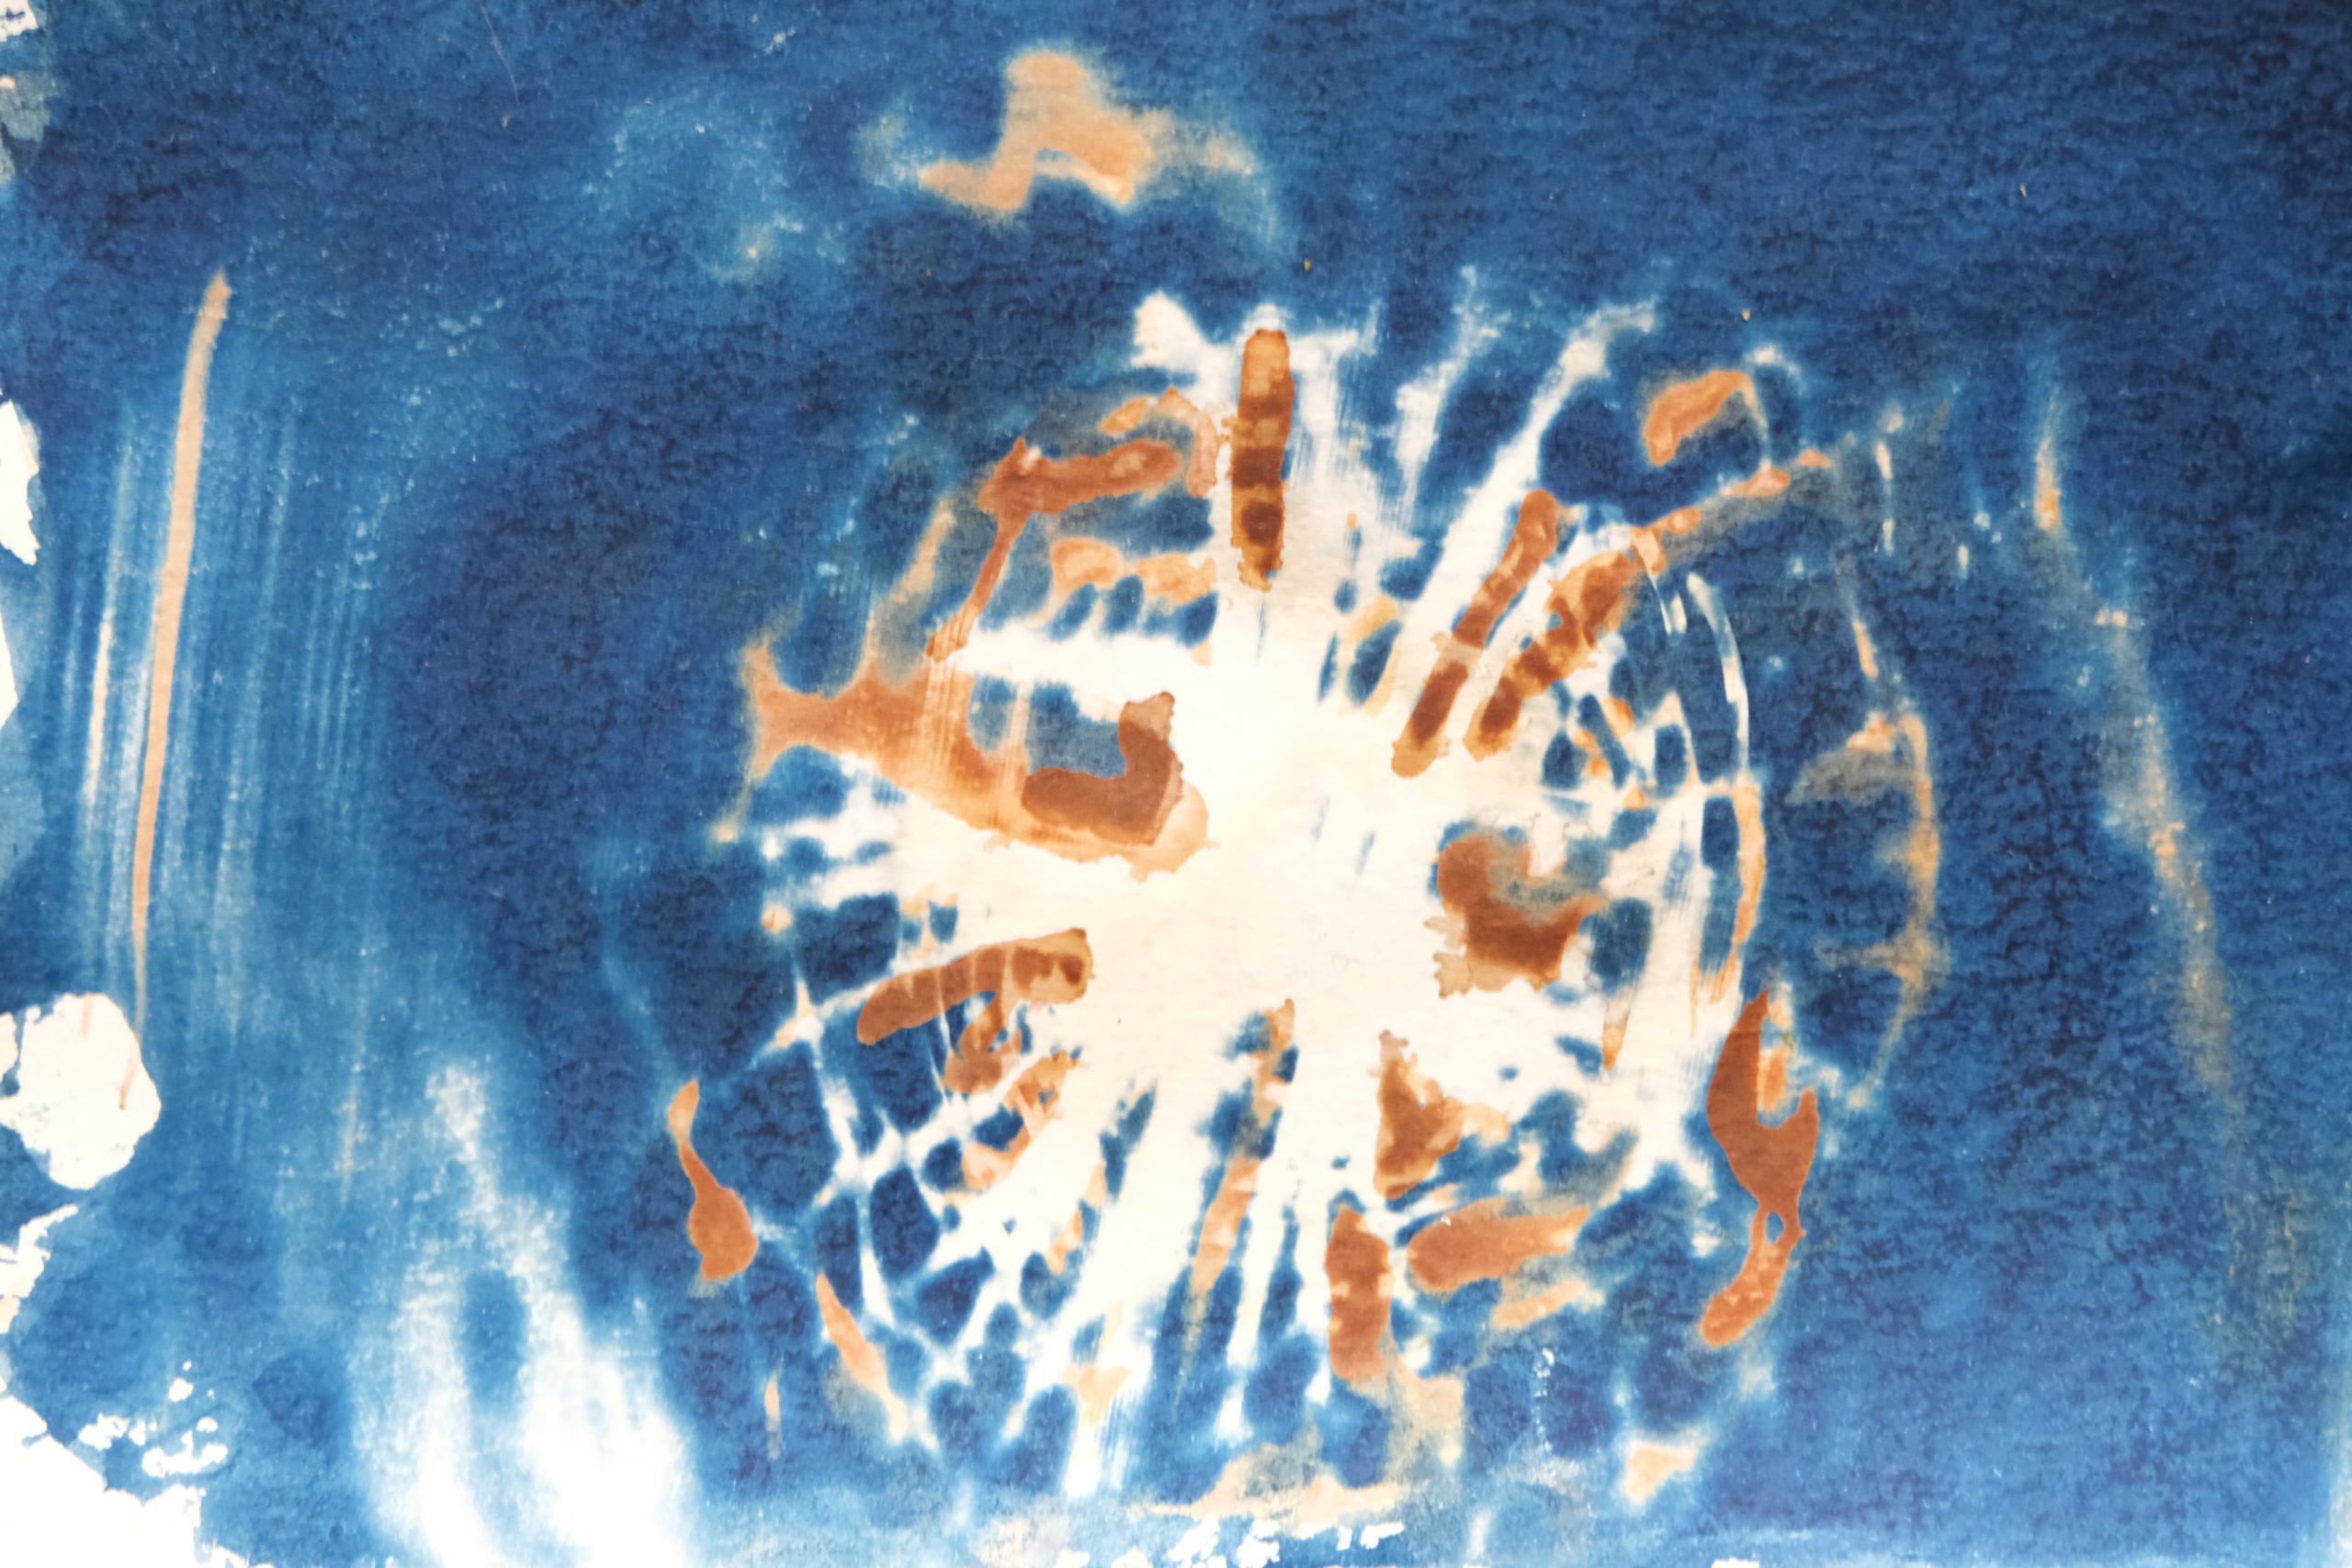
- In the absence of strong UV light, apply a 5% silver nitrate aqueous solution to your cyanotype. A brush may be helpful. Within a few moments or minutes (shorter for lighter blues, longer for darker blues), you’ll see your print start to bleach where you applied the silver nitrate. Apply more layers of silver nitrate to areas where you want heavier bleaching and toning to occur.
- Let the print dry and expose it to UV light.
- Repeat steps 1-2 as desired to achieve further bleaching and toning.
Things to keep in mind
This method really is as simple as outlined above. There are a few things to keep in mind though.
- You can do this process under low UV light. I like to do it in indirect sunlight. Note that this may mean that your prints start to tone before they fully dry- I haven’t seen any issues with this. While the silver nitrate is very UV reactive, it tends to dry long before it’s fully exposed.
- Keep your silver nitrate solution for bleaching and toning cyanotypes separate from your silver nitrate solutions used for other photographic processes. It’s highly likely that you’ll cross contaminate the silver nitrate with the cyanotype chemicals as you brush the silver nitrate onto the cyanotype then dip your brush back into the silver nitrate.
- Slightly adulterated silver nitrate solution may still work. I accidentally got a little bit of natural dye into my silver nitrate, so the color is off. While this adulterated silver nitrate doesn’t give as consistent of results as I’d like for my chromatography, it works just fine with bleaching cyanotypes. A brief test comparing its ability to bleach and tone with an unadulterated silver nitrate solution shows no substantive difference between the two. Though obviously this will highly vary depending on what substances are contaminating your silver nitrate solution.
- I’ve been very conscientious about not accidentally exposing my silver nitrate to UV light. It turns brown very quickly, even when exposed to tiny amounts of UV. However, I’ve been using my adulterated silver nitrate during the day in rooms where indirect, weaker sunlight is coming in through curtains. The brief moments that the bottle is open don’t seem to damage its ability to bleach and tone. So if you have partially exposed silver nitrate solution, this may be a good way to use it up.
- The more silver nitrate you use (ex multiple layers or stronger solutions), the more the white areas of your print will tone as well. However, the blue areas will tone even darker. To preserve white areas on your prints, either avoid applying the toner to those areas or underexpose your cyanotype. Underexposing it means you can use less silver nitrate, which means your whites will stay whiter.
- Washing your toned print is not necessary. Very preliminary tests show that washing doesn’t have a negative impact but it might- chromatograms (which are made with silver nitrate) usually aren’t water resistant.
Future Experiments
- Try mixing solutions of silver nitrate with other liquids like tea
- Bleach and tone a print with silver nitrate, then layer another toner on top of that
- Try this method with cyanotypes made from digital negatives- so far I’ve just done contact prints of objects
- Try this method with a stronger silver nitrate solution- I accidentally made an 8% solution the other night, so I’ll be testing that slightly stronger one out.
There are a number of things to explore with this method. What do you think I should try next?
Do you have any questions about this process? Will you try this method? If so, please share your work with me! You can leave a comment here or tag me on Instagram on my @not_a_bird_designs account.
UPDATE 3.3.24: see my latest progress with combining these techniques
Leave a Reply